
Handwriting Repeater
A free handwriting repeater for UK classrooms. Type a word or pick a letter family, and watch it written stroke by stroke in correct print, pre-cursive or cursive, on a loop, ready for your interactive whiteboard.
Presets
Ready-made setups
My presets (saved on this device)
My saved writing (from Write and replay)
Settings
Keyboard shortcuts
- Space
- Play or pause
- →
- Next stroke
- R
- Start again
- P
- Present view
- Esc
- Leave Present view
- Ctrl Z
- Undo a stroke (Ctrl Y to redo)
Write here with a finger, stylus or mouse. Then press Replay to watch your writing again, stroke by stroke.
Nothing you type or record leaves your device. No sign-up, no download.
How These Letters Are Formed
- hOne-armed robot letterStart at the top line, go straight down, back up to the middle, over the hump and down to the baseline.
- aCurly caterpillar letterStart like c, curl back round to close the circle, go up to the middle line, then straight down to the baseline.
- nOne-armed robot letterStart at the middle line, go straight down, back up the same line, over the hump and down to the baseline.
- dCurly caterpillar letterStart like c, curl round to close the circle, go up to the top line, then straight down to the baseline.
- wZig-zag monster letterStart at the middle line, slant down, up, down and up again.
- rOne-armed robot letterStart at the middle line, go straight down, back up the same line, and over to the right.
- iLong ladder letterStart at the middle line and go straight down to the baseline. Take the pencil off and add the dot above.
- tLong ladder letterStart between the top and middle lines, go down and curve a little to the right at the bottom. Take the pencil off and draw the cross stroke along the middle line.
- gCurly caterpillar letterStart like c, curl round to close the circle, go up to the middle line, then down below the baseline and hook to the left.
What Is A Handwriting Repeater?
A handwriting repeater is a classroom tool that writes letters and words on screen one stroke at a time, so children can watch the movement and copy it. The teacher types a word, the tool writes it, and it loops until the class has finished.
Some repeaters replay whatever you draw. Others take typed text and show it in a handwriting font. This one writes each letter from stroke data: where it starts, which way it moves, the order of the strokes and where it stops. That is the part a font cannot show.
How Do You Use The Handwriting Repeater, Step By Step?
Type a word, press Play and the letters write themselves. Everything else is optional. The steps below show each feature as it looks on screen, and the full video tutorial shows every one of them working, chapter by chapter.
Read the transcript
0:06 Welcome to the Handwriting Repeater, a free tool for UK classrooms. It writes letters and words on screen one stroke at a time, so children can see exactly where each letter starts, which way it goes, and the order of the strokes. There's nothing to download and no account to make. In this tutorial, we'll go through every feature, one by one.
0:32 Let's start with the layout. Along the top are the four modes: Watch, Trace, Write and replay, and Lesson. Next to them are the handwriting style and the lines. Below that is the box where you type, with the Play, Present, Presets, Settings and Share buttons. In the middle is the stage, where the letters are written. Under the letters, a caption says each movement in words. And at the bottom are the playback controls.
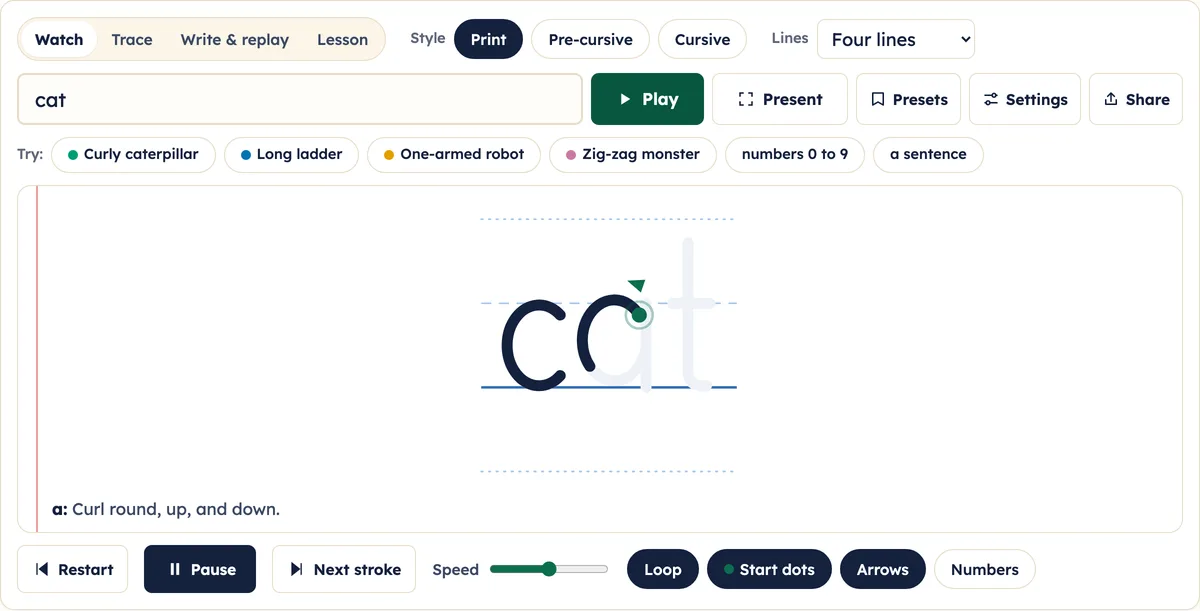
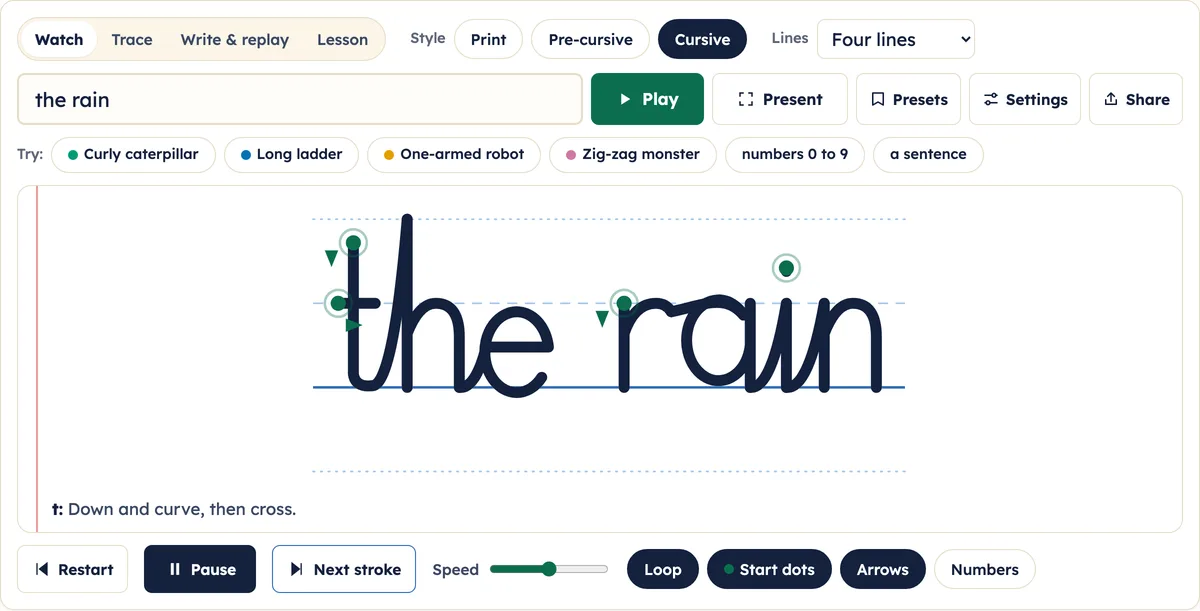
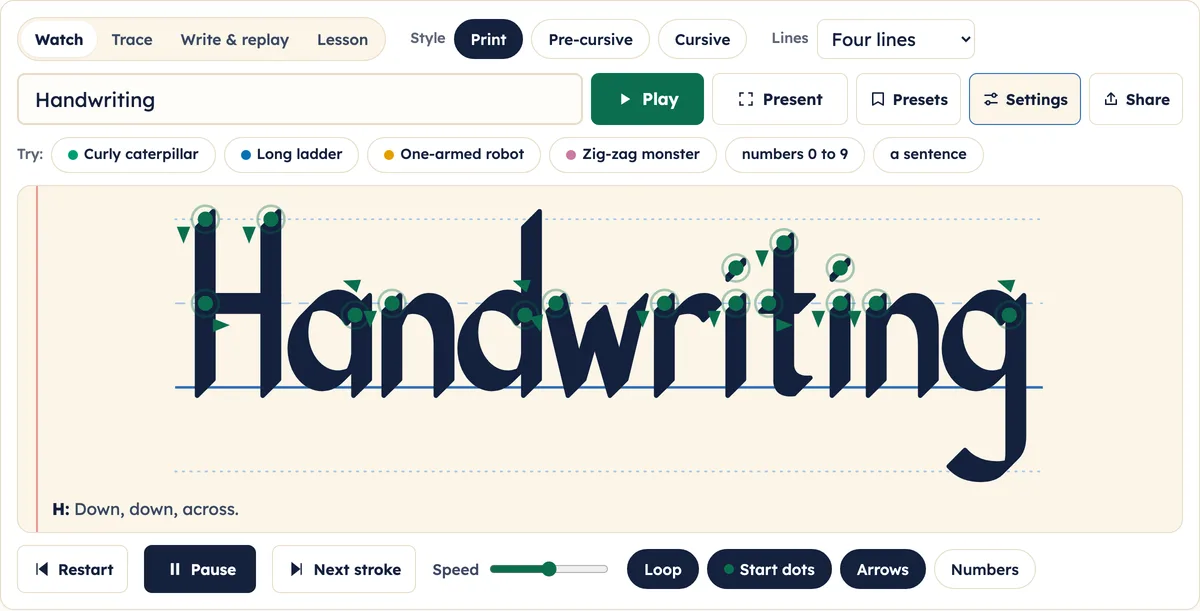
1:07 To start, click in the box and type a word. We'll type cat. Press Play, or press Enter on the keyboard. The tool writes each letter in order. The green dot shows where the pencil starts, and the small arrow shows which way it moves first.
1:27 Watch the caption under the letters. It changes with every letter, so you can say the movement out loud with the class: curl round, up and down. When the word is finished, it starts again on its own. That's the loop. Click Loop to switch it off, and the word is written just once. Click Loop again to switch it back on.
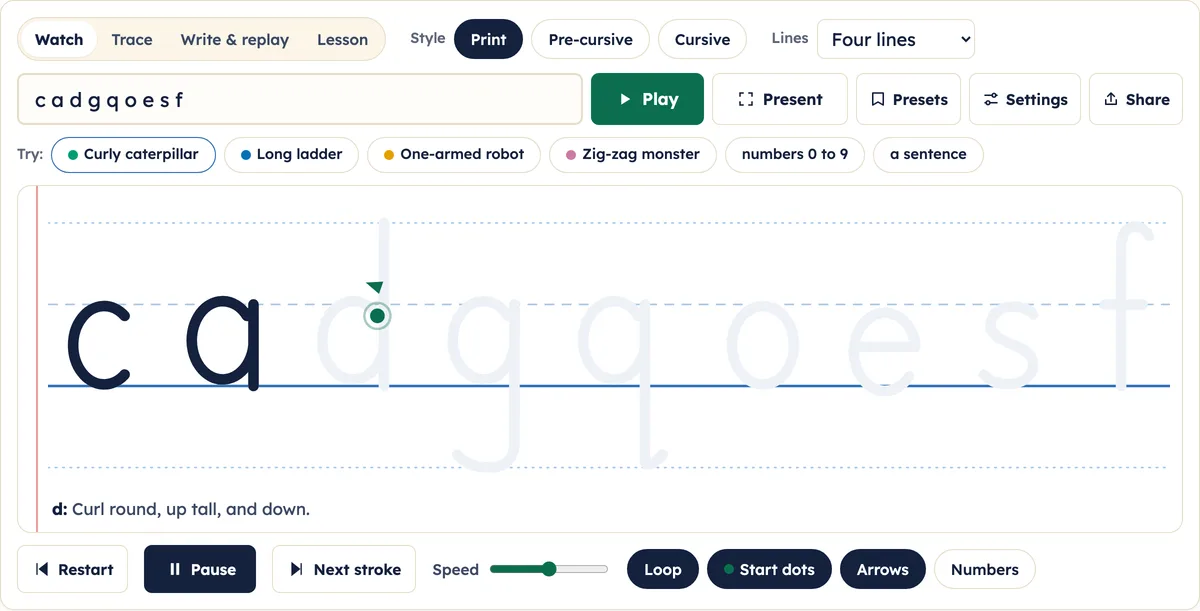
1:50 You don't have to type at all. The Try buttons load a set of letters in one click. Curly caterpillar, long ladder, one-armed robot and zig-zag monster are the four letter families most UK schools use. There are also the numbers nought to nine, and a short sentence. Here are the curly caterpillar letters. Every one of them starts with the same curl.
2:16 Capital letters and numbers work too. Here's a name with a capital letter and a number. Anything the tool can't write, like a question mark, is skipped, and a note tells you exactly which characters were left out.
2:32 The playback controls sit under the stage. Pause stops the writing, and the same button plays it again. Restart goes back to the beginning. Drag the speed slider to the left to slow it down for younger children, or to the right to speed it up.
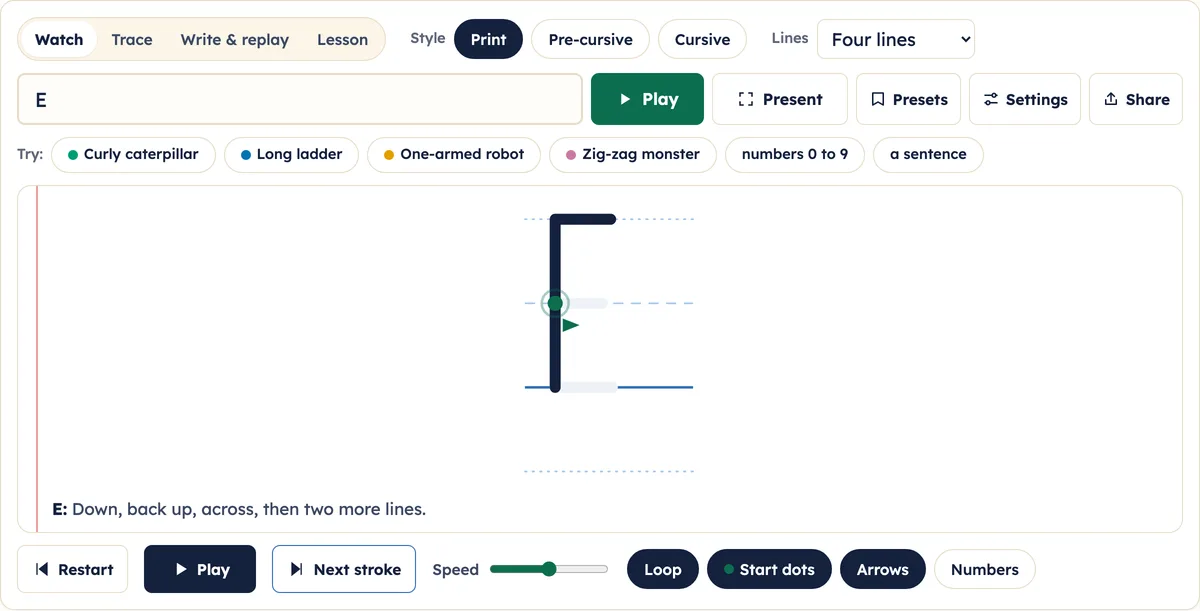
2:50 To teach one stroke at a time, press Pause, then Next stroke. The letter draws a single stroke and waits. This is the moment to ask the class: where does the next stroke start? Press Next stroke again for the next one.
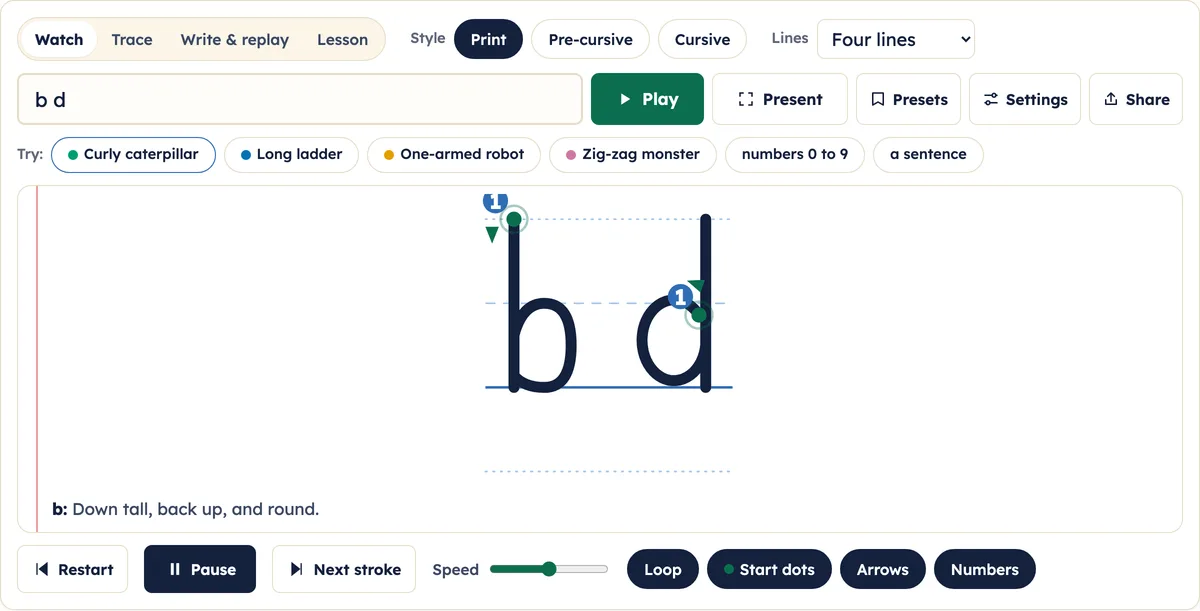
3:08 Three switches control the guides on the letters. Start dots shows the green dots. Arrows shows the direction arrows. And Numbers adds a number to every stroke, so children can see the order. Turn them on and off to suit the lesson. Many teachers start with everything on, then take the guides away as children grow more confident.
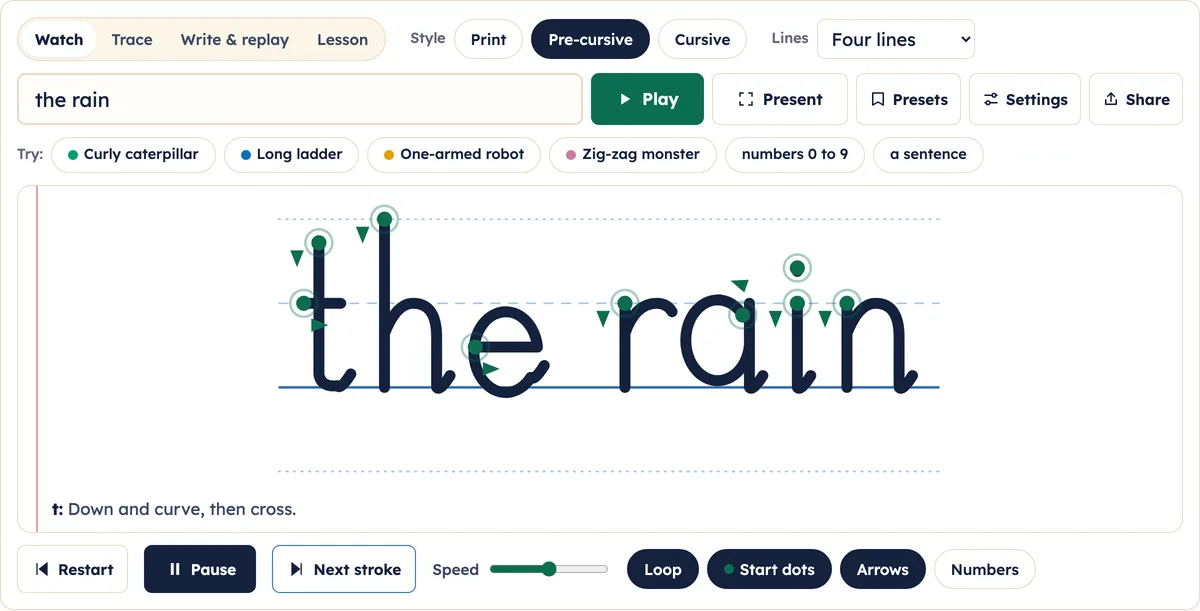
3:34 Next, the handwriting style. Print writes separate letters with no tails. Pre-cursive adds a small exit flick to the end of letters, ready for joining. Cursive joins the letters, and the joins are written as strokes too, so children see exactly where each join leaves one letter and enters the next. The site remembers your style on this device, and every other tool on the site uses it too.
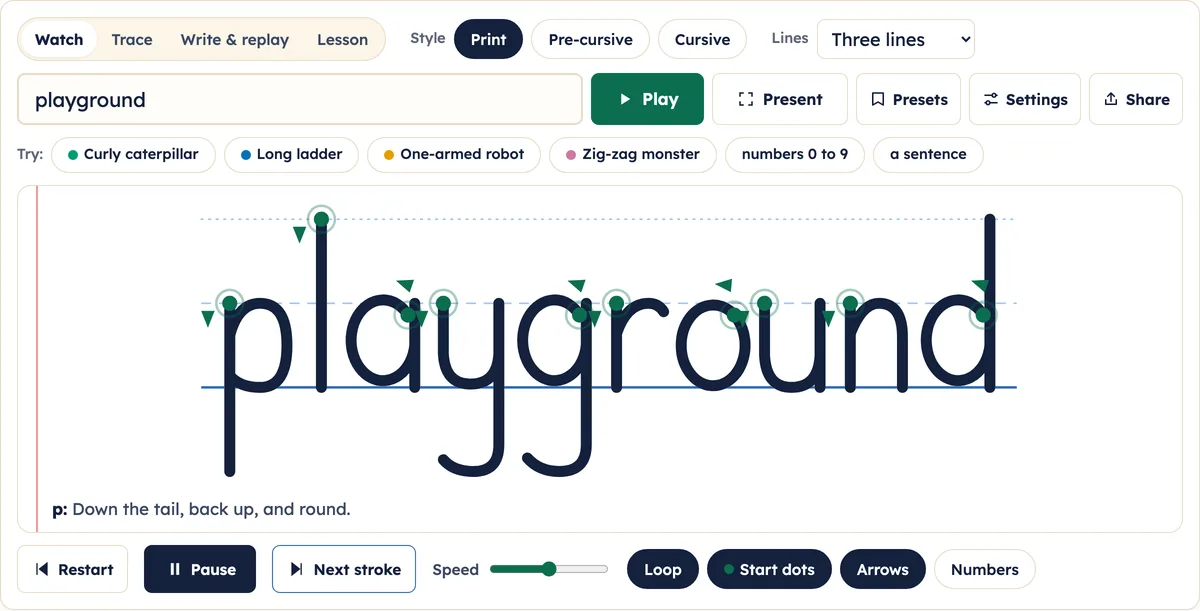
4:03 Use the Lines menu to change the handwriting lines. Four lines show the top line, the middle line, the base line, and the tail line underneath. Three lines drop the tail line. Two lines show just the middle and base lines. And baseline only is for children who size their letters confidently. The letters always grow to fill the stage, so they stay big enough to read from the back of the room.
4:33 Below the tool, How These Letters Are Formed describes every letter on screen in words: which family it belongs to, where it starts, and each stroke in order. It updates whenever you change the word. It's useful for teaching assistants, for parents, and for children who use a screen reader.
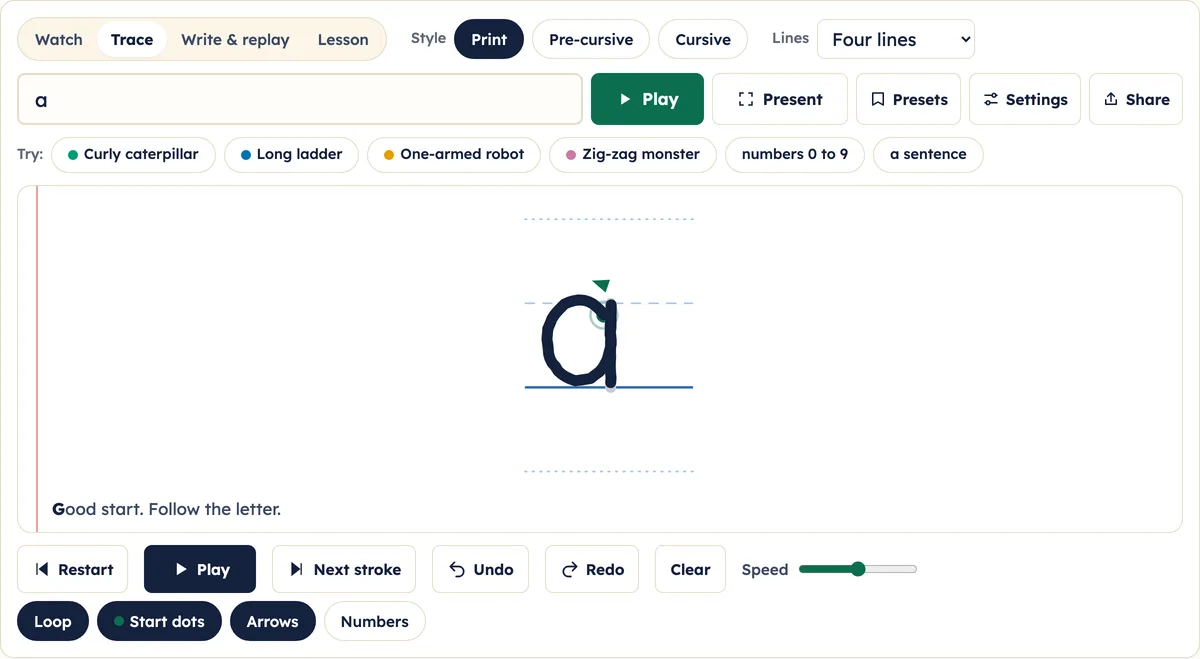
4:56 Now let's look at Trace mode. Click Trace. The letters turn faint, with their start dots. Children trace over them with a finger on a touch screen, a stylus, or the mouse. If they begin somewhere else, the caption gently says, try starting on a green dot. If they begin on the green dot, it says, good start. There's never a score.
5:23 Undo removes the last stroke, and Redo puts it back. Clear wipes the tracing completely. And Replay plays the child's own tracing back, stroke by stroke. It's a great way to talk about where they started.
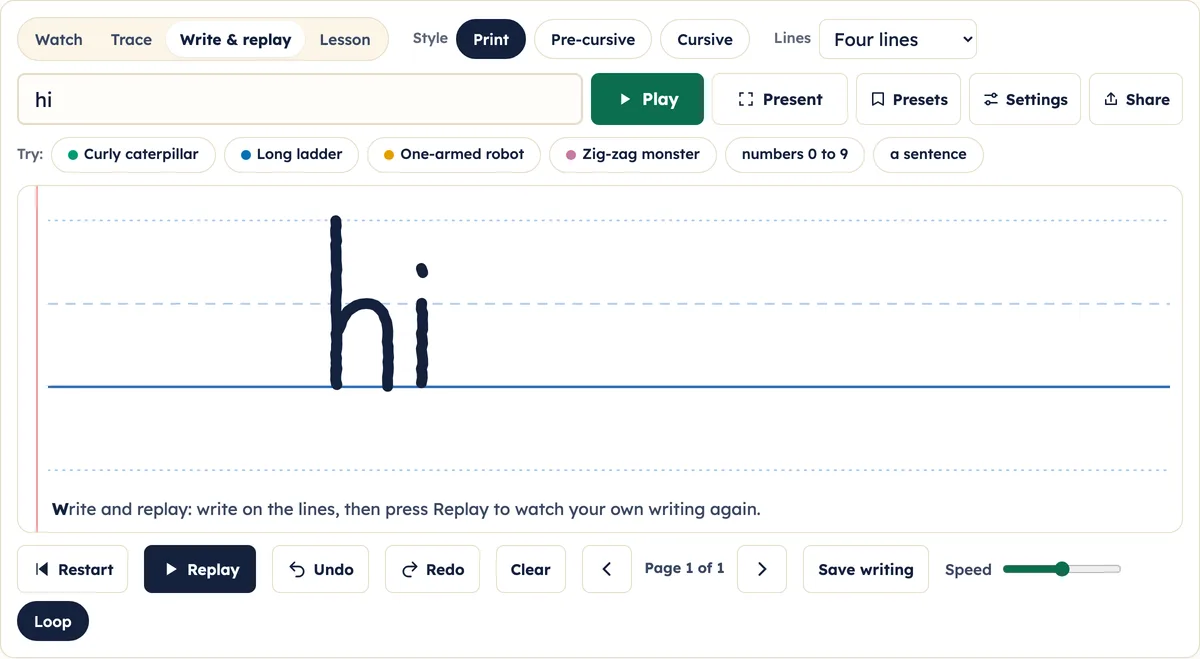
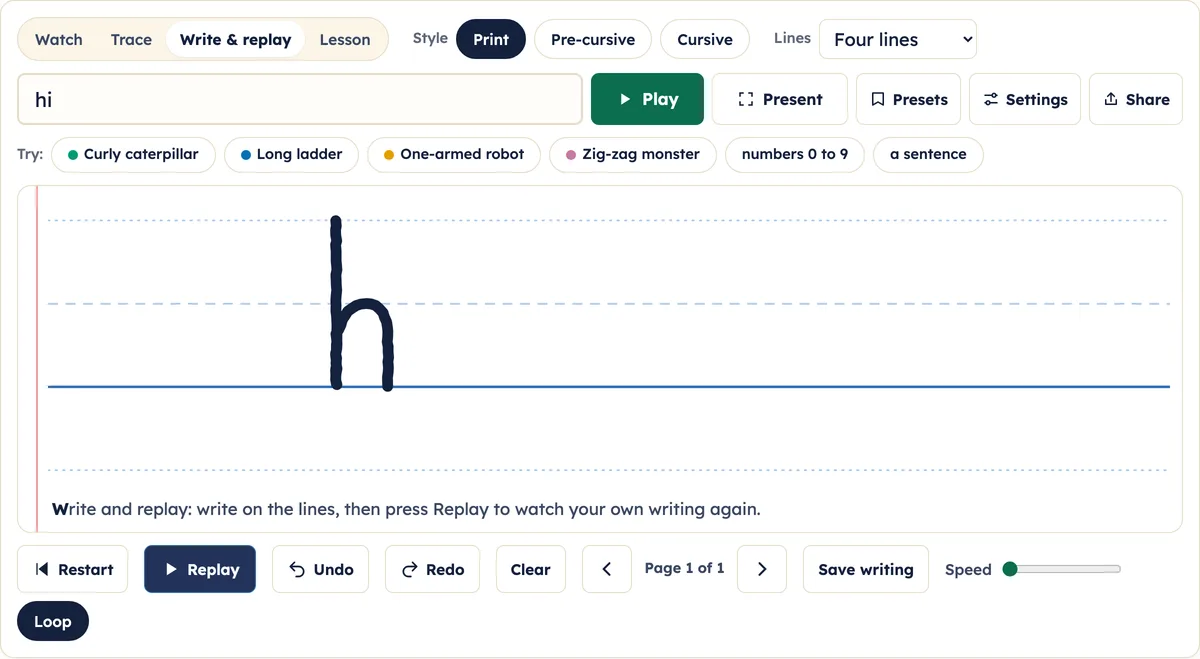
5:44 Write and replay is for your own handwriting. Click Write and replay, and you get a blank lined page. Write on the lines with your finger, a stylus, or the mouse. Here, we'll write the word hi.
6:00 Now press Replay. Your writing plays back stroke by stroke, in the same order and at the same speed you wrote it. Long pauses are shortened, so the replay flows. Use the speed slider to slow it down or speed it up, and Loop to repeat it.
6:19 Made a mistake? Undo takes away the last stroke, and Redo brings it back. You can also press Control Z and Control Y on the keyboard. Clear wipes the page. The arrow on the right adds a new page, so you can keep writing. The left arrow goes back to earlier pages, and each page keeps its own writing.
6:44 Save writing keeps this page on your device. You'll find it later under Presets, in My saved writing, where one click plays it back. You can keep up to six.
6:58 Teachers use Write and replay to model their own handwriting on the board, or to put a child's attempt next to the correct letter and talk about the start point. Nothing you write is uploaded. It stays in the browser, on your device.
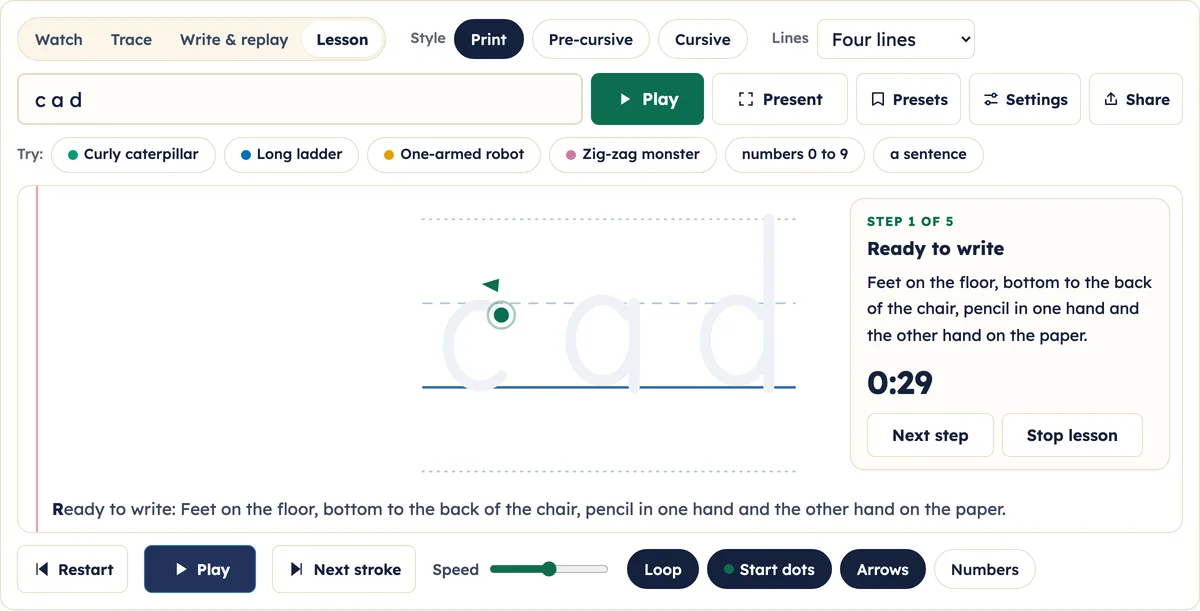
7:18 Lesson mode runs a short, timed routine for your daily handwriting slot. Type today's letters, then click Lesson. Step one is ready to write: feet on the floor, and pencil in hand. Then comes a warm-up, then watching the model, then practising in books, and finally a quick review. Each step shows what to do, with a countdown. Next step moves on early, and Stop lesson takes you back to Watch.
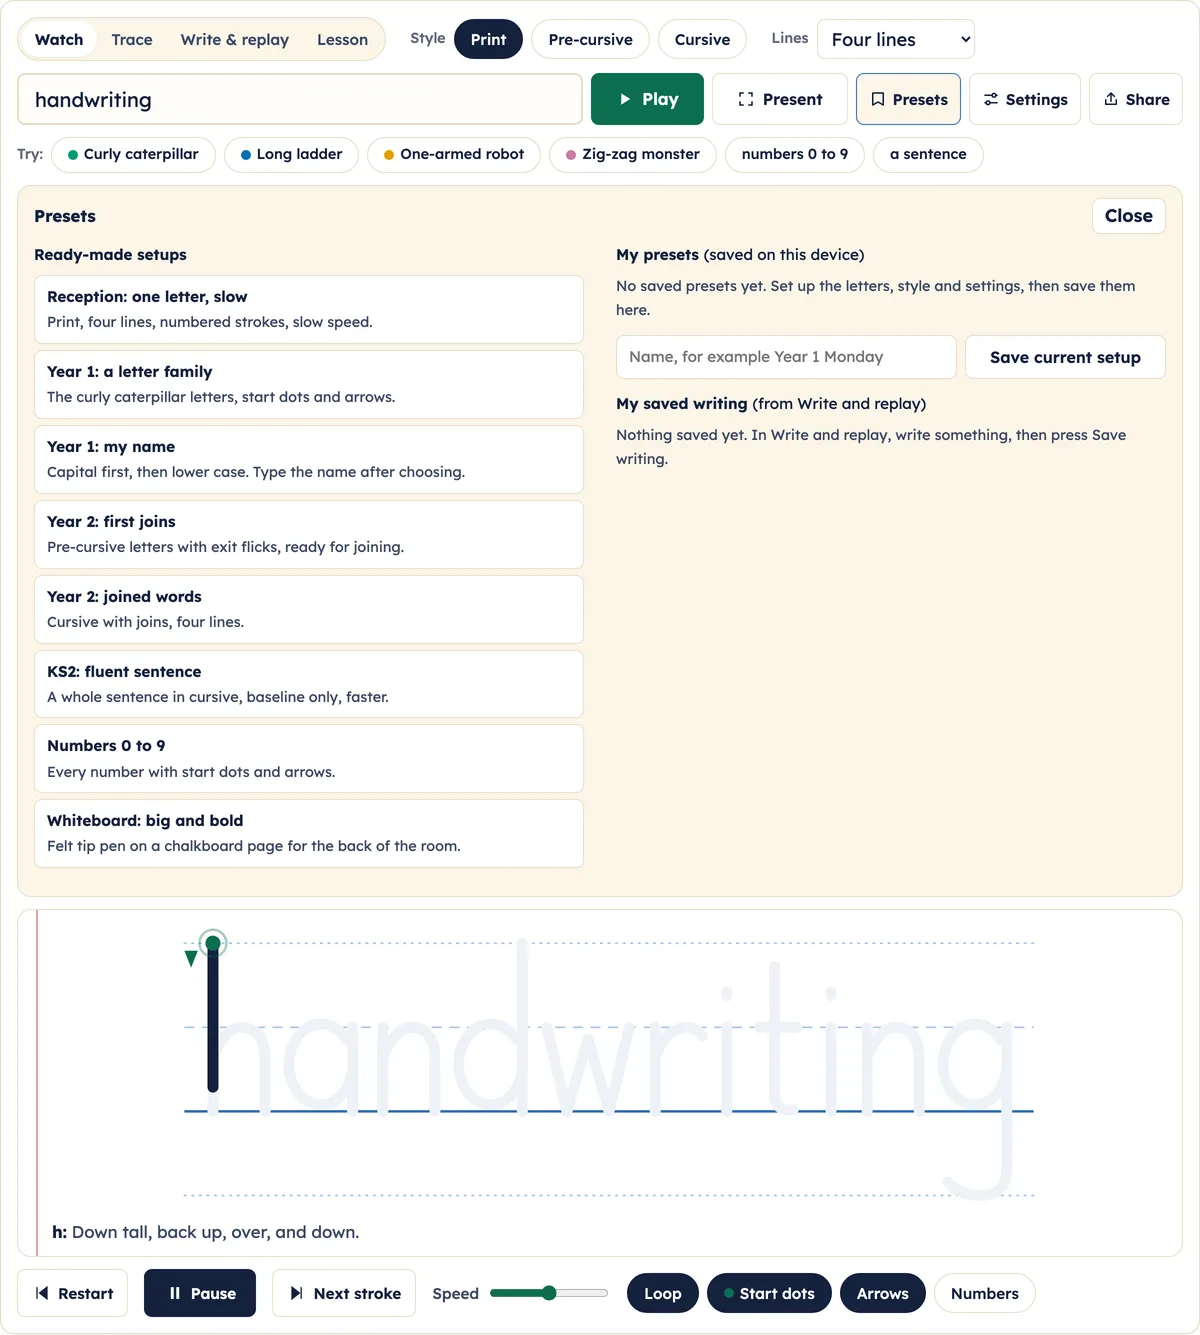
7:52 Presets set everything up in one click. Open Presets to see the ready-made setups: from one slow letter for Reception, through letter families and first joins in Year 1 and Year 2, to a fluent joined sentence for Key Stage 2. Click one, and it loads the letters, the style, the lines, the speed and the guides together.
8:15 To save your own, set everything up the way you like it, type a name, such as Year 1 Monday, and press Save current setup. It appears under My presets, on this device. Delete removes it. This is also the way to save your own school's style.
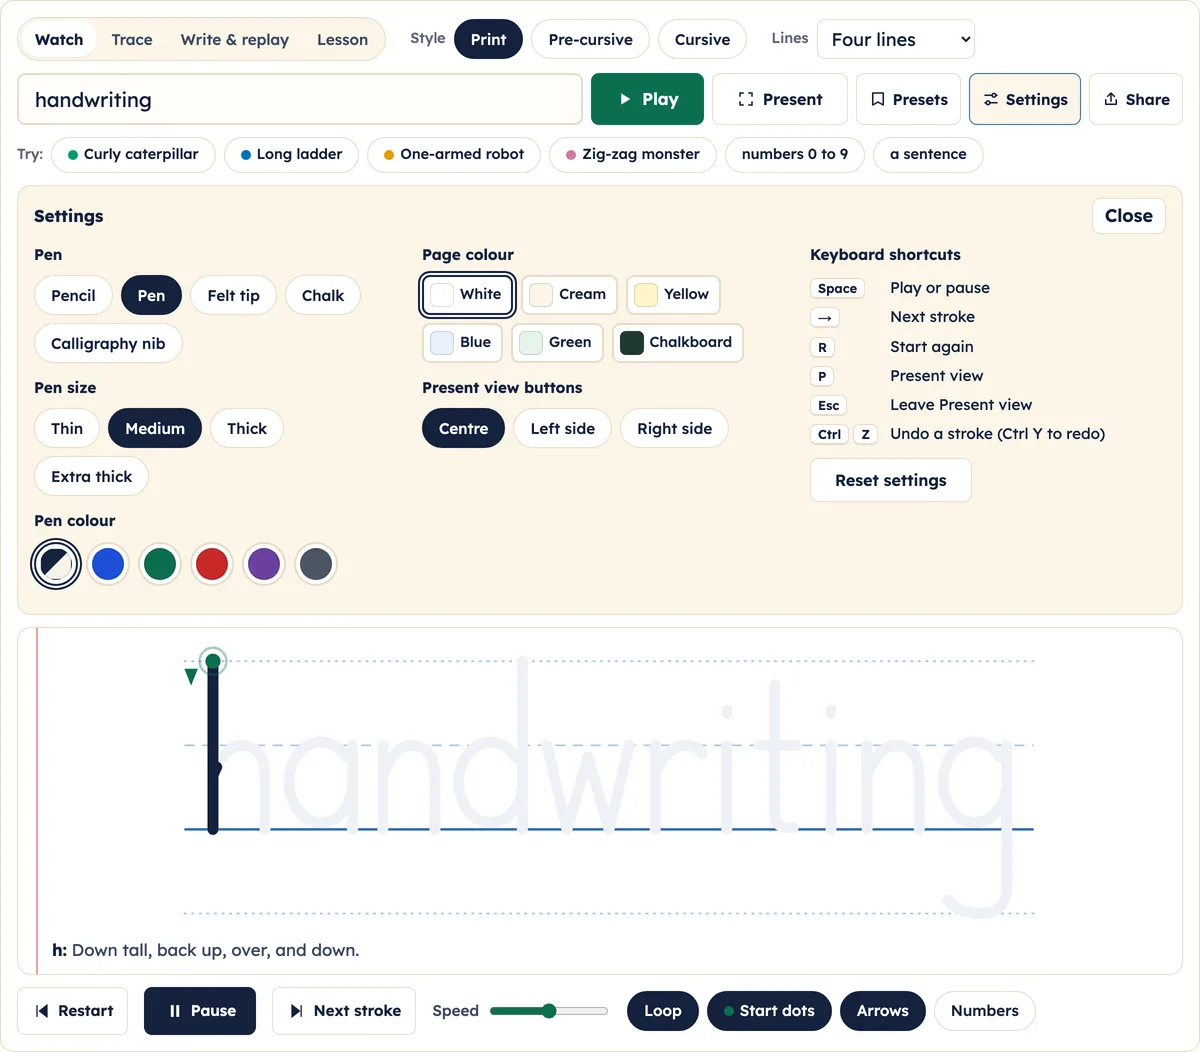
8:37 Open Settings to change how the writing looks. First, the pen. Pencil has a soft, grainy line. Pen is smooth. Felt tip is bold. Chalk looks like chalk on a board. And the calligraphy nib makes thick and thin strokes, just like a real broad-edged pen.
8:56 Pen size makes the strokes thinner or bolder: thin, medium, thick, or extra thick. Pen colour has six inks. The first one is the default, and it turns to white chalk automatically on the chalkboard page.
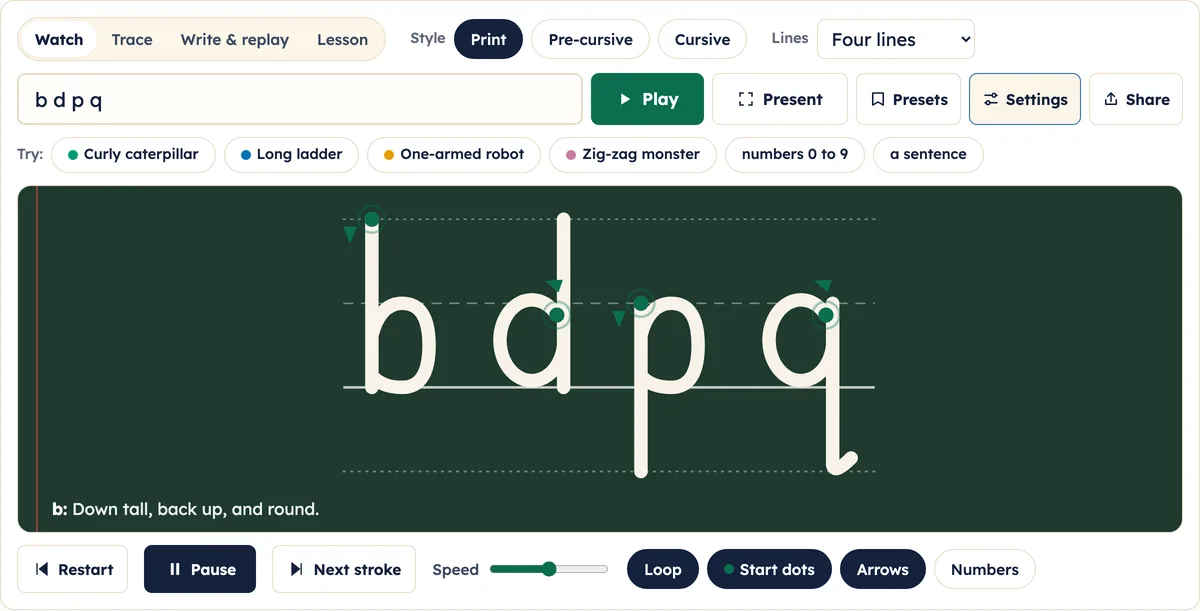
9:15 Page colour changes the background: white, cream, yellow, blue, green, or a dark chalkboard. Choose whichever your class finds easiest to read. The chalkboard is especially clear on a bright whiteboard. These settings apply to the model letters and to your own writing, and they're remembered on this device.
9:39 Present view buttons lets you put the big buttons in the middle, on the left, or on the right of the whiteboard, whichever side you stand. On the right are the keyboard shortcuts: Space to play or pause, the right arrow for the next stroke, R to start again, P for Present view, Escape to leave it, and Control Z to undo. Reset settings puts everything back to normal.
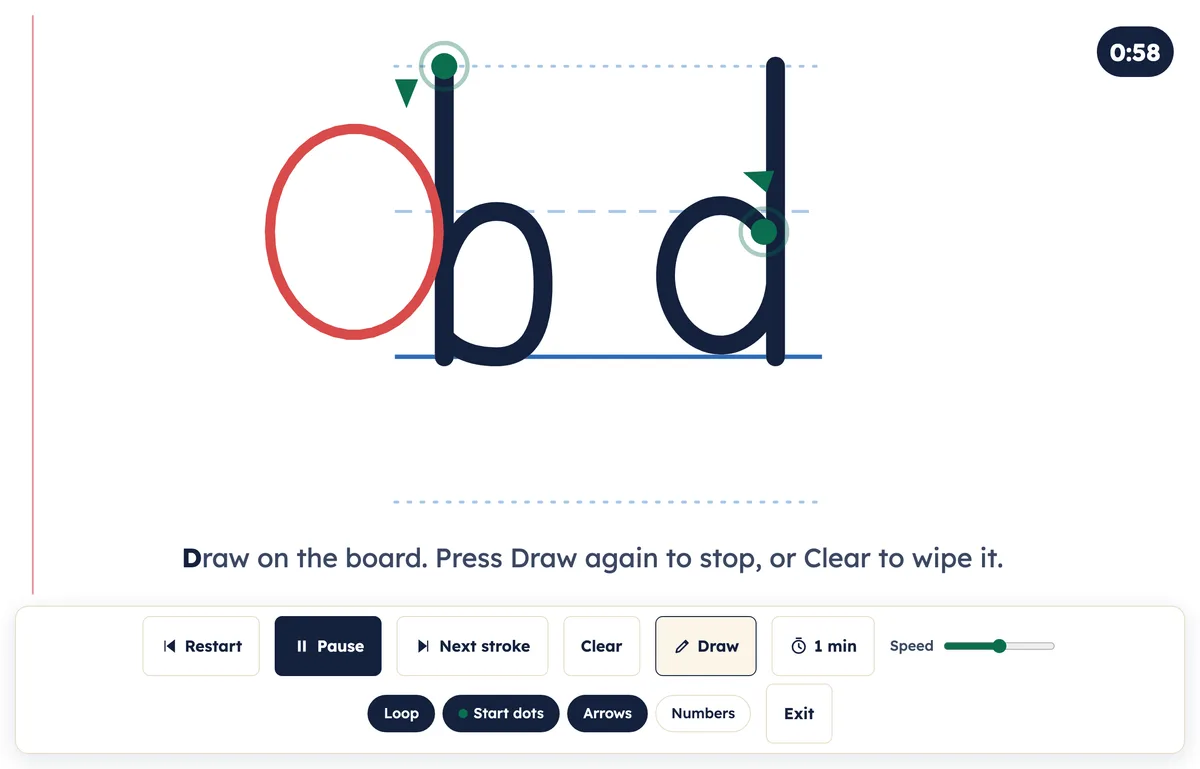
10:09 When you're ready to teach, press Present. The tool fills the whole screen with just the letters and large buttons, easy to reach on an interactive whiteboard. Press Escape, or the Exit button, to leave.
10:25 In Present view, press Draw to write on the board with a red pen, for example to circle a start point. Clear wipes it, and pressing Draw again stops drawing. The Timer button counts down one minute. Press it again for two minutes, again for five, and once more to switch it off. When the time is up, the timer turns red.
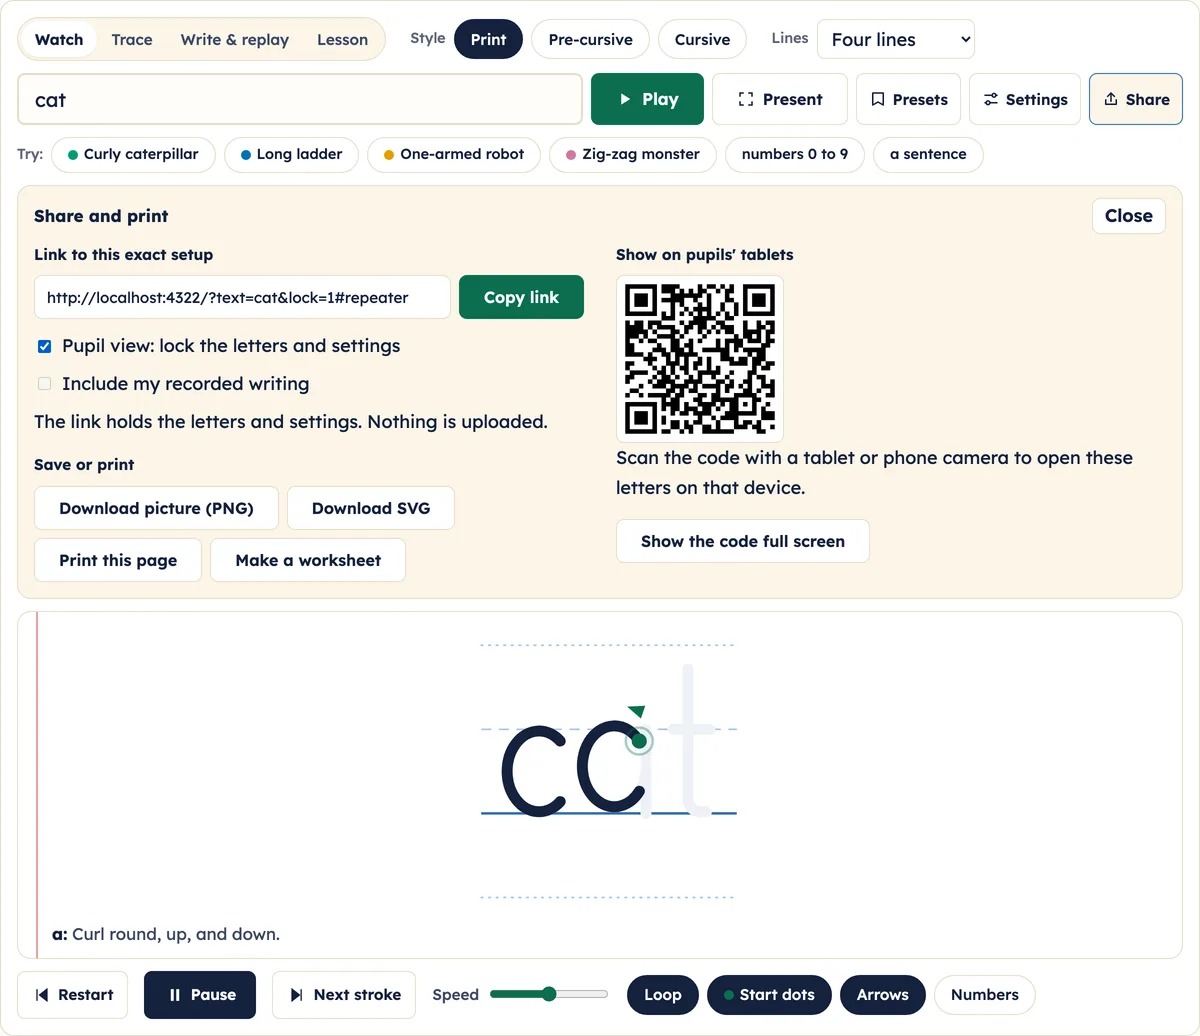
10:54 Share and print is where you send the letters to other devices. The link at the top opens this exact setup: the word, the style, the lines, the speed and the look. Press Copy link, and paste it into an email, a class page, or a slide. Nothing is uploaded; everything is inside the link.
11:16 If you've written something in Write and replay, tick Include my recorded writing, and the link carries your handwriting too, so others can watch it replay. That option only goes in the link, not the QR code, because handwriting is too long for a code.
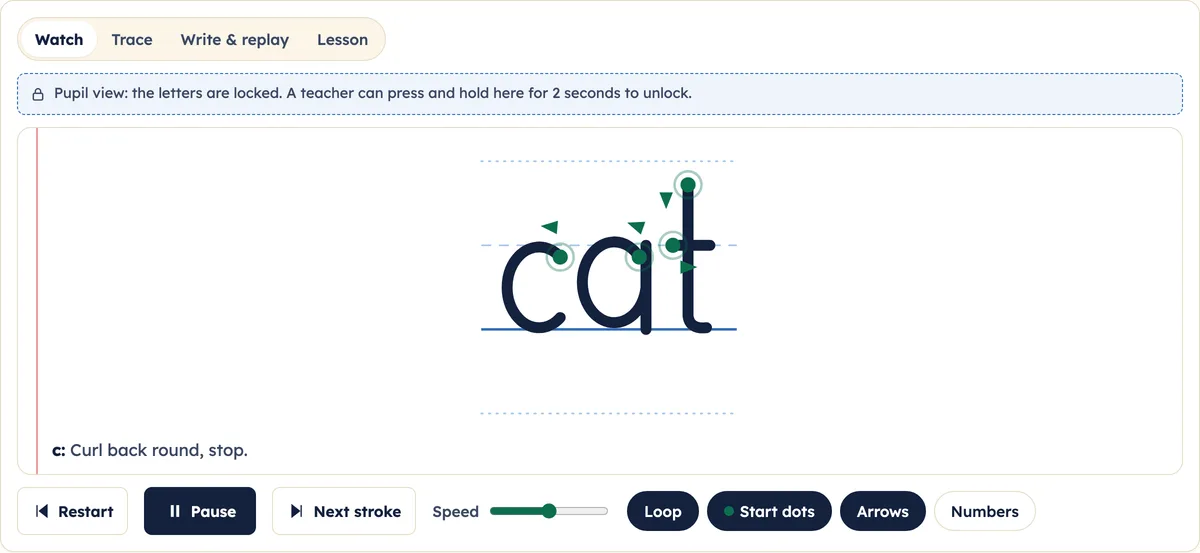
11:34 Tick Pupil view to lock the letters and settings. When a pupil opens the link, they can play, pause and trace, but they can't change the word or the settings. A teacher unlocks it by pressing and holding the notice for two seconds.
11:50 For tablets, scan the QR code with the tablet's camera, and the same letters open on that device. Show the code full screen puts it big on the board, so the whole class can scan it at once.
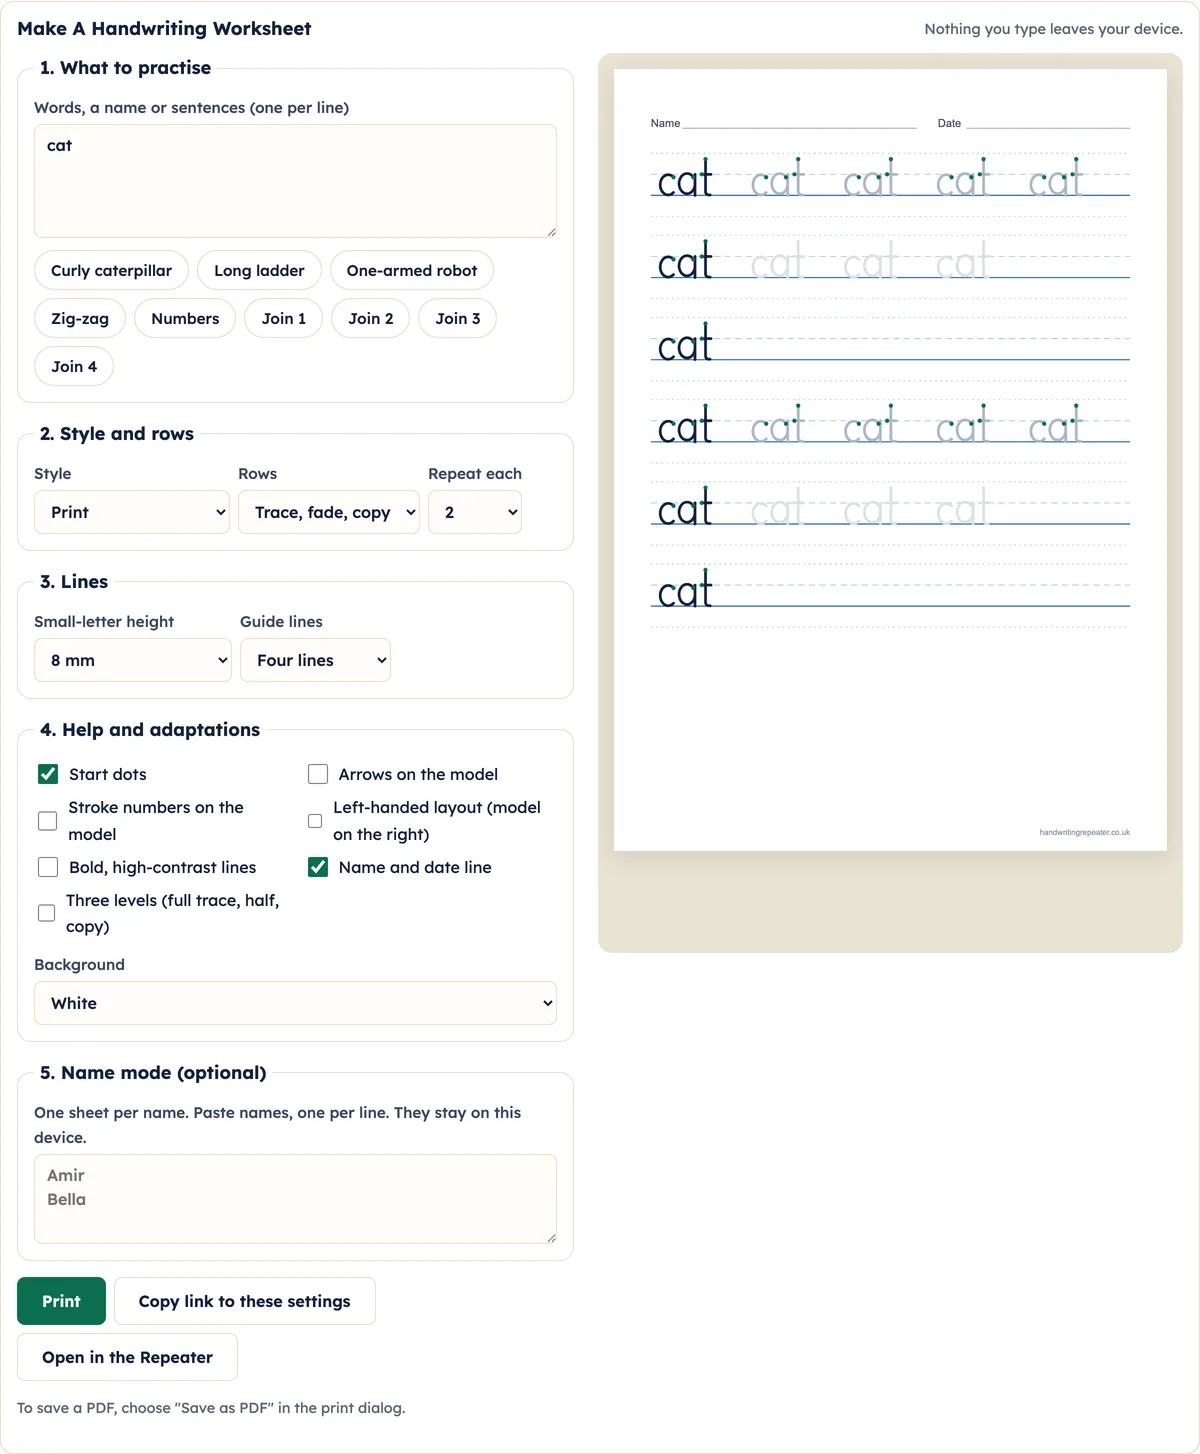
12:04 Under Save or print, Download picture saves the letters as an image, ready for slides or worksheets. Download SVG saves a sharp version that can be any size. Print this page prints the letters large on A4, or saves a PDF from the print window. And Make a worksheet opens the worksheet generator with the same word and style, with trace, fade and copy rows, ready to print.
12:38 Back on the home page, the tool remembers your last word, and a Continue button in the Try row brings it back in one click. Further down the page, each letter family card has a Play in the repeater button, which plays that family straight away.
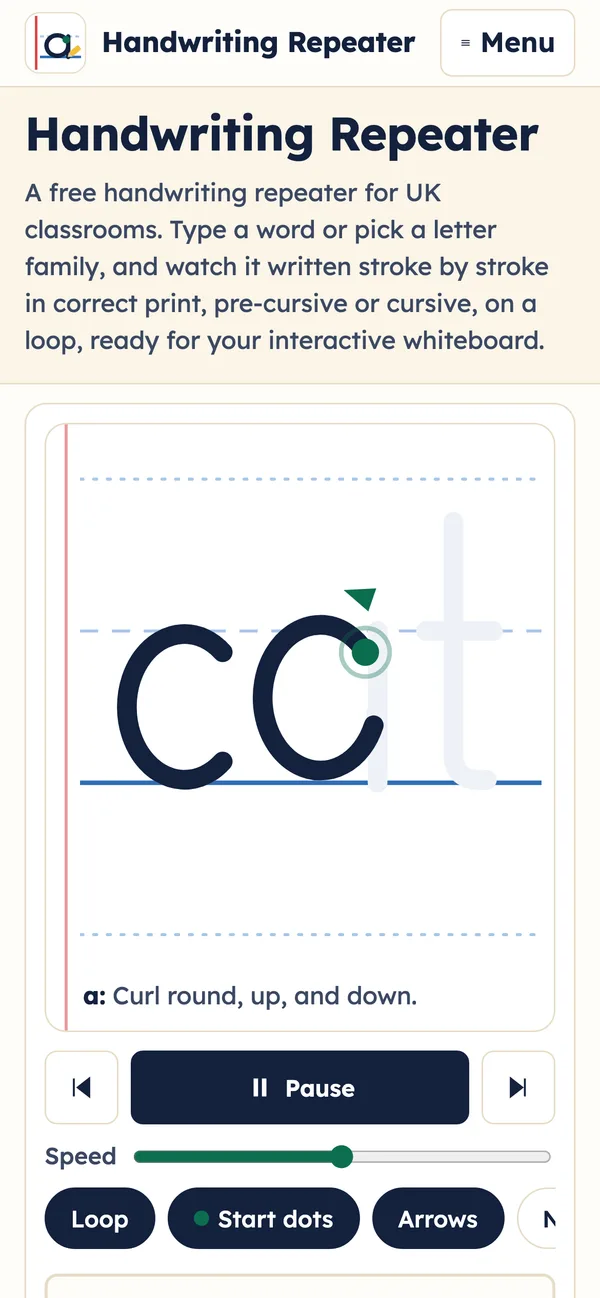
12:56 The Handwriting Repeater works on phones and tablets too. The letters come first, with the play buttons right under your thumb, and Write and replay gives a tall page for finger writing. On a tablet or a classroom computer, you can add it to your home screen, and it opens just like an app.
13:16 Everything you type, record or save stays in the browser, on your device. There's no sign-up, and the tool is completely free. You'll find letter formation guides, worksheets and lesson ideas across the rest of the site. Thanks for watching, and happy handwriting.
Step 1: Type A Word Or Pick A Letter Family
Type any letters, words or a short sentence in the box and press Play. The Try buttons underneath load a whole letter family, the numbers 0 to 9 or a sample sentence in one tap.
Step 2: Watch The Start Dots, Arrows And Stroke Numbers
A green dot marks where each stroke starts, an arrow shows which way the pencil moves, and numbers show the order. Turn each one on or off with the buttons under the letters.
Step 3: Go One Stroke At A Time
Press Pause, then Next stroke. The letter draws one stroke and waits, so the class can say the movement before you move on. The caption under the letters says the movement in words.
Step 4: Choose Print, Pre-Cursive Or Cursive
The style buttons switch every letter at once. Pre-cursive adds exit flicks. Cursive adds the diagonal and horizontal joins. The site remembers the style you choose on that device.
Step 5: Pick The Handwriting Lines
Choose four lines, three lines, two lines or the baseline only. The letters grow to fill the space, so they stay big enough to see from the back of the classroom.
Step 6: Trace Over The Letters
Choose Trace. The letters turn faint with their start dots, and children trace over them with a finger, stylus or mouse. The caption says "Good start" when a stroke begins on a green dot. It never gives a score. Press Replay to watch the tracing again.
Step 7: Write And Replay Your Own Handwriting
Choose Write and replay and write on the lines. Press Replay and your writing plays back stroke by stroke, at the speed you wrote it. Undo, Redo and Clear fix mistakes, the arrows add more pages, and Save writing keeps it on the device.
Step 8: Run A Five-Step Lesson
Choose Lesson for a timed routine: ready to write, warm-up, watch the model, practise and review. Each step shows what to do and a countdown. Skip or stop at any time.
Step 9: Use A Preset Or Save Your Own
Presets set the letters, style, lines and guides in one tap, from one slow letter for Reception to a fluent cursive sentence for KS2. Save your own setup with a name, such as Year 1 Monday.
Step 10: Change The Pen, Size, Colour And Page
Settings has five pens (pencil, pen, felt tip, chalk and a calligraphy nib), four pen sizes, six ink colours and six page colours, including a chalkboard. The same pen is used for the model letters and for your own writing.
Step 11: Present It On The Whiteboard
Press Present for a full-screen view with large buttons. Draw on the board to circle a start point, run a one, two or five minute timer, and put the buttons on the left or right if you stand to one side.
Step 12: Share It With Pupils' Tablets
Share gives a link to the exact setup and a QR code for tablets. Tick Pupil view to lock the letters and settings, so children can play and trace but not change the word. A teacher unlocks it by holding the notice for two seconds.
Step 13: Download, Print Or Make A Worksheet
The same panel downloads the letters as a picture (PNG or SVG), prints them, or opens the worksheet generator with the same word and style.
Step 14: Use It On A Phone Or Tablet
On a phone the letters come first, with the play buttons under your thumb. Write and replay gives a tall writing page, so there is room for a finger.
Which Handwriting Styles Can It Show?
Every UK school teaches a slightly different style, so the repeater offers the three most common ones. Switch between them with the style chip above the canvas.
| Style | What it looks like | When UK schools use it |
|---|---|---|
| Separate letters with no tails | Reception and Year 1. The DfE writing framework says joined handwriting should wait until children form print letters correctly and consistently | |
| Pre-cursive | Print letters with a small exit flick | Many schools use it to prepare for joining. The framework says lead-ins are not expected, so it is a school choice |
| Cursive | Letters joined with diagonal and horizontal strokes | From Year 2, when the National Curriculum asks pupils to start using some of the strokes needed to join letters |
Your school's style is different? Choose the nearest one, then save it as a preset called "Our school style". The repeater remembers it on that device.
How Do Teachers Use It On The Interactive Whiteboard?
A short daily slot is the norm, and ten minutes is enough. The DfE writing framework says handwriting should be taught daily until pupils can write legibly and easily.
Here is a routine that works with the repeater on the board:
- Choose the style your school teaches.
- Pick a family preset, or type this week's spellings.
- Set the lines and switch on start dots and arrows.
- Press play and let it loop. Say the movement aloud with the class: "down, round, up".
- Children write in their books while you walk round the room.
- Stop the loop and step one stroke at a time for anyone who is stuck.
The repeater supports your own modelling. It does not replace it. The framework asks for handwriting to be demonstrated by the teacher, and it warns that copying from the board or tracing without supervision can fix the wrong movement. Use the loop to free yourself up, then watch pencils and grips, not the screen. There is more on this in our guide to modelled handwriting.
Can I Show Handwriting Lines And Change Their Size?
Yes. Pick four-line, three-line, two-line or single-line guides. The letters and lines grow to fill the screen, and the pen size setting makes the strokes thinner or bolder.
-
Four lines
-
Three lines
-
Two lines
-
Single line
| Guides | What they show | Best for |
|---|---|---|
| Four lines | Top, middle, base and tail lines | Teaching where tall letters stop and tails begin |
| Three lines | Top, middle and base | Children who know their zones |
| Two lines | Middle and base | Children settling into consistent size |
| Single line | The baseline only | Children who size letters confidently |
The writing framework calls wide-lined paper "essential" in Year 1 and says children move to narrower lines once they write legibly and easily on wide ones. Print matching paper from our handwriting lines page.
How Does It Show Letter Families And Joins?
Pick a family and the repeater plays its letters in order from the same start dot. The presets follow the four named families most UK schools use.
Curly Caterpillar Letters
Letters: c a d g q o e s f. Every one starts with the same curl back round.
Play in the repeaterLong Ladder Letters
Letters: l i t u j y. A straight line down comes first.
Play in the repeaterOne-Armed Robot Letters
Letters: r n m b h p k. Down, back up, then over.
Play in the repeaterZig-Zag Monster Letters
Letters: z v w x. Straight diagonals with sharp points.
Play in the repeaterFamilies are not identical everywhere. The DfE writing framework lists five typical groups, and schemes move a few letters between them, so the letter families page shows both. For joins, the repeater animates each join as its own stroke. Type any word on the handwriting joins page to see them coloured by type.
Can I Record My Own Handwriting And Replay It?
Yes. Choose Write and replay, write on the lines with a finger, stylus or mouse, and press Replay. The repeater plays your writing back stroke by stroke, in the order and at the speed you wrote it, and loops it if Loop is on. Add pages with the arrow button, undo a stroke, and save the writing on the device or share it as a link.
It is a quick way to show a class your own model, or to put a child's attempt next to the correct one and talk about the start point. Recordings stay on the device unless you choose to share the link.
What Makes Letter Formation "Correct"?
Correct letter formation means four things: each letter starts in the right place, moves in the right direction, follows the right stroke order and finishes at the right point. Schools also check that letters sit on the line and that tall, small and tail parts keep their proportions.
The repeater shows all four on every letter. See letter formation for each letter from a to z, and ascenders and descenders for the tall and tail parts.
Can I Print Practice Sheets In The Same Handwriting?
Yes. The worksheet generator prints trace, fade and copy rows in the same letterforms you see on screen, with start dots and arrows.
Give sheets to children after the movement has been shown, and keep an eye on them while they write. Tracing on its own does not teach the movement, which is why the framework says to supervise it.
Is It Safe To Use In School?
There is no account to make and no pupil information to enter. Anything typed or recorded stays in the browser on your device, and nothing is sent to our servers. The tool runs full screen with nothing over the canvas. Read the privacy notice for the detail.
Questions Teachers Ask
Is The Handwriting Repeater Free?
Yes. It is free, with no sign-up.
Is There An App?
There is nothing to download. It runs in the browser on any tablet, phone or computer, and adds to your home screen like an app.
Does It Work On Promethean And SMART Boards?
It runs in the browser on interactive whiteboards and touch panels. Press Present for full screen with large buttons, a timer and a pen for drawing on the board.
Which Letter Families Does It Use?
The four named families most UK schools use, with the DfE's five typical groups shown on the letter families page for comparison.
Where Do The Letterforms Come From?
Every letter is drawn from stroke data and was checked against at least two published UK models, including Oak National Academy's handwriting lessons, Little Wandle Letters and Sounds Revised and BBC Bitesize. The about page explains the method.
How Is It Different From Other Handwriting Repeaters?
It does both jobs. It writes UK letterforms from stroke data, with start dots, arrows and stroke order, and it also records and replays your own handwriting with pens, sizes, colours and pages. On top of that it has letter families, joins, a lesson mode, presets, a pupil lock with QR codes for tablets, and matching worksheets.
Free Handwriting Tools On This Site
Every tool runs in the browser, needs no sign-up and keeps what you type on your device.
- Worksheet GeneratorTrace, fade and copy rows in print, pre-cursive or cursive, on true-size lines.
- Lined Paper MakerPrintable handwriting paper from 4 mm to 12 mm, with two, three or four lines.
- Cursive WorksheetsJoined-up practice sheets for any word or sentence.
- Letter Family SorterA class game: put each letter into the family it belongs to.
- Join AnalyserType a word and see every diagonal and horizontal join coloured in.
- Practice Sentence FinderSentences that practise a chosen letter, join or family.
- Warm-Up PlayerA two or four minute routine with a countdown for the board.
- Handwriting Speed TestTime a copying task and count the words per minute.
- Whole-Class Assessment GridTick off formation, sizing and spacing for every pupil.
- Progression GridAn editable EYFS to Year 6 grid you can download for Word.
- Lesson BuilderPlan a short handwriting lesson and run it in the Repeater.
- Intervention PlannerA six-week small-group plan for KS2.
- Policy BuilderBuild a school handwriting policy and download it for Word.
- Certificate MakerPersonalised handwriting awards to print.
- Pen Licence MakerA pen licence with the pupil’s name, ready to print.
Handwriting Guides By Topic
Guides for teachers and parents, written in UK English and checked against published UK sources.
Letter Formation
Where every letter and number starts, which way it goes, and the rhymes that help children remember.
Letter Families
The four families of letters that start with the same movement, and the order to teach them.
Joins And Styles
Pre-cursive, cursive and continuous cursive, the four joins, and school handwriting fonts.
Worksheets And Printables
Make practice sheets, lined paper, certificates and pen licences in UK school styles.
Teaching Handwriting
Lesson structure, modelling, warm-ups, patterns, fine motor skills and whole-class checks.
Curriculum And Schools
What the National Curriculum and EYFS expect, year by year, plus schemes and a policy template.
Help And Support
Reversals, grip, posture, left-handers, dyspraxia, and help for parents and adults.